














BlogHow To Guides
X Pixel Setup: Base Code, GTM, Shopify and Events
Every way to install the X Pixel, with X's own steps and code: creating it in Events Manager, the base code, event code, Google Tag Manager through the partner integration, Shopify, Ensighten and Tealium. Then the event types and parameters, cookies and consent, and how to check it all with the X Pixel Helper and the event statuses.


Contents
Summarise this article with AI
Opens the page with a ready prompt in:


Nothing is sent until you pick a service.
Pasting the X Pixel (formerly the Twitter pixel) into a site is quick. Setting it up so the numbers mean something takes longer, because every route makes decisions for you: which events exist, whether they carry a value and a conversion_id, whether the email is passed for matching, and whether anything ever reaches X's Conversions API. A Shopify store on X's app and a SaaS site with hand-written event code both have "the X Pixel", and they send X very different things.
This guide covers every route X documents, with the steps and the code: creating the Pixel in Events Manager, the base code, event code and its parameters, Google Tag Manager through Events Manager's partner integration, Shopify, Ensighten and Tealium. Then cookies and consent, and verification with the X Pixel Helper and the event statuses in Events Manager.
Quick Summary: How to Set Up the X Pixel
In short
To set up the X Pixel you create it in X Ads Manager under Tools, Events Manager, Add event source, install its base code once on every page before the closing head tag, and then add event code for each conversion. X documents these install routes: the base code pasted into the site, Google Tag Manager through Events Manager's partner integration (client side, server side or both), Ensighten and Tealium iQ, and X's own app on Shopify. The base code alone gives you Site Visit and Landing Page View events; conversions are the event types Lead, Purchase, Add to cart, Added payment info, Page view or Custom, each a twq('event') call with the event's ID. Give revenue events a value and a currency, give every event the Conversions API also sends a conversion_id, and check each one with the X Pixel Helper and Events Manager before a campaign depends on it.
Which conversions to count in the first place, why X credits conversions after a like as well as a click, and how the Pixel fits together with the Conversions API and your CRM, is in the X Ads conversion tracking guide. This one is the installation.
Before You Start: Create the Pixel and Pick One Method
Everything starts in X Ads Manager. Open Tools, then Events Manager, and select Add event source. The event source ID X shows you is your Pixel ID, and it is the ID in every snippet below. If you cannot see a Tools tab at all, X says the usual reason is that the ad account has no credit card on file yet, so add a payment method first. You also need the right to edit your site's head, your GTM container or your shop's apps.
Then pick one install method per page. The Pixel Helper warns when a pixel fires more than once, and the usual way to get there is two methods at once: the base code in the theme plus a GTM tag, or X's Shopify app on a store that already had the code pasted in.
The X Pixel install methods, and what each one gives you
| Method | Best for | Event code | Conversions API |
|---|---|---|---|
| The base code in the head | Any site whose template you can edit | Yes, twq('event', ...) calls in your code | Separate: you add it yourself |
| GTM, client side | Sites that already manage their tags in GTM | Yes, from dataLayer standard events and gtag.js triggers | No |
| GTM, server side or both | GTM sites with a server container | Yes, on the client side half | Yes, through X's official server template |
| Ensighten or Tealium iQ | Teams whose tags live in one of those | Through the "Twitter Pixel" app or tag | Tealium is a listed Conversions API partner |
| X's app for Shopify | Stores that want a pixel without code | Not described by X | Not documented by X |
Method 1: Install the Base Code
The manual install gives you the most control and needs somebody who can edit the site's template. X says the base code "should be implemented across all pages", pasted before the closing </head> tag, and that event code "requires the base code". On a CMS or shop system, that means the header template, so every page carries it, including the ad's landing page.
<!-- X Pixel base code -->
<script>
!function(e,t,n,s,u,a){e.twq||(s=e.twq=function(){
s.exe?s.exe.apply(s,arguments):s.queue.push(arguments);
},s.version='1.1',s.queue=[],u=t.createElement(n),u.async=!0,
u.src='https://static.ads-twitter.com/uwt.js',
a=t.getElementsByTagName(n)[0],a.parentNode.insertBefore(u,a))
}(window,document,'script');
twq('config','<PIXEL_ID>');
</script>
<!-- End X Pixel base code -->
Copy your own code from Events Manager rather than retyping this one: your ID is filled in. The part you work with is the last line. twq('config') starts the Pixel with your ID, and every conversion you add later is a twq('event') call after it. If one page has to report to several pixels, say two ad accounts, X's answer is one twq('config') line per Pixel ID under the same loader, not a second copy of the whole snippet.
As soon as the base code runs, X creates two events for you: Site Visit and Landing Page View. You do not write code for either. They are what Events Manager shows first when the install worked.
If your site sends a Content Security Policy
A CSP can stop the Pixel from loading or sending events. X asks for ads-twitter.com, ads-api.twitter.com and analytics.twitter.com in img-src and connect-src, and the loader itself comes from static.ads-twitter.com. After the change, trigger an event and look for blocked requests in the browser's network tab and console.
Event Code: The X Pixel Event Types
Each conversion is an event you create in Events Manager first, and then fire from the page. When you create one, X asks for its type, and today's list has six.
X Pixel event types offered when you create an event, and what they are for
| Event type | Typical use | Notes |
|---|---|---|
| Page view | A page that matters, such as pricing or a product | Deduplicated within 30 minutes, like Site Visit and Landing Page View |
| Add to cart | A product added to the basket | Needed, with Page View, Content View and Purchase, for dynamic product ads |
| Lead | A form submitted, a demo requested | Not deduplicated: a reloaded thank-you page fires it again |
| Added payment info | Payment details entered at checkout | A step before the Purchase |
| Purchase | An order completed | Send the value and the currency |
| Custom | Anything else you want to see, such as a booked call | Name it so the meaning is clear in reports |
Events Manager then gives each event its ID, and the event code fires it by that ID. The ID takes the form tw- plus your Pixel ID plus the event's own ID:
// After the base code, on the page or state that confirms the lead.
// conversion_id is the key X deduplicates on when the
// Conversions API sends the same event.
twq('event', 'tw-<PIXEL_ID>-<EVENT_ID>', {
  value: <LEAD_VALUE>,
  currency: '<CURRENCY>',
  conversion_id: '<LEAD_ID>',
  email_address: '<EMAIL>'
});
Two rules from X keep the events meaningful. "In almost all cases, a particular conversion type ... should only be used once on your website": decide whether the Lead is the demo request or the newsletter, not both. And if an older account still runs legacy event types, X says they can still be optimised on, and advises re-creating them with the new types if reporting shows no metrics for them. A campaign on the Sales objective needs at least one conversion event before you can build it, so fire the event for real first.
Event Parameters and User Parameters
Parameters are the object after the event ID. X notes they only work for events defined with code; an event set up with a URL rule in Events Manager carries none. These are the ones X documents:
X Pixel event parameters and what they carry
| Parameter | Format | What it is for |
|---|---|---|
| value | A number, integer or decimal | The revenue or the value you assign to the conversion |
| currency | An ISO 4217 code such as USD or EUR | The currency of the value |
| conversion_id | A string, unique per conversion | Deduplication against the same event from the Conversions API |
| search_string | Text | The query, on a search event |
| description | Text | A free description of the conversion |
| twclid | The click ID | Optional: forces attribution to one ad click |
| status | started or completed | The state of a multi-step action |
| contents | An array of content_type, content_id, content_name, content_price, num_items, content_group_id | The products, with content_type from Google's product taxonomy |
On twclid X is specific: "The X Pixel already automatically passes twclid from URL or first-party cookie. This parameter can be optionally used to force attribution to a certain ad click." You do not need it in a normal install.
User parameters: email and phone
Two user parameters improve matching: email_address and phone_number, the phone in the format +11234567890. You pass them in plain text, and X says the Pixel hashes them itself with SHA-256, so no unhashed data is shared with X. Pass them where you know them, typically on the event that fires after a form. A Restricted Data Use parameter also exists for visitors whose data must be limited; X sets it up only through a support ticket.
Method 2: Google Tag Manager Through Events Manager
X does not ask you to build GTM tags by hand. Events Manager connects to your Google account and sets the container up for you, client side for the Pixel, server side for the Conversions API, or both. Pick this route or the base code, not both, or every event fires twice.
- In Events Manager, open Install Pixel, then Partner Integrations, and choose Google Tag Manager.
- Sign in to Google with OAuth and allow X access to your Tag Manager account.
- Choose client side (the Pixel), server side (the Conversions API) or both, and select the container.
- For events past the page view, switch on "Track Google Tag Manager dataLayer Standard Events", and make sure your site pushes those events, with triggers set up with gtag.js.
- Open GTM's preview, trigger each conversion and watch it in the X Pixel Helper before you publish the container.
The server side half runs on X's official template, "X Ads Conversion API (Official)" in the Community Template Gallery, which works in server containers only. It maps GA4 events onto X events (an event without an Event ID set becomes gtm_ plus the event name), hashes a plain email after trimming and lowercasing it, and hashes the phone without reformatting it, so send the phone in E.164 already. It authenticates with a Conversion API access token you generate in Events Manager (Install Pixel, Manual, Conversion API, Generate access token), and X says no OAuth 1.0a or Ads API application is needed on this route. With its first-party cookie setting on, which is the default, the server tag also keeps the twclid in a cookie of its own for about 390 days. The full server setup belongs to the X Conversions API guide.
Method 3: Shopify, Ensighten and Tealium
X's app for Shopify
X publishes a free app called X in the Shopify App Store, supported by X, which promises to "Track performance with a 1-click X Pixel installation." It has been listed since May 2022 and was rated 3.7 from 82 reviews when we read it on 7 October 2026. Install it, connect your X Ads account, and the Pixel goes onto the store without code. Remove any X base code pasted into the theme first, or the store carries the Pixel twice.
Know the limit before you rely on it: the listing does not say whether the app also sends server-side events, and we found no X page that does. If you need the Conversions API on Shopify, plan another route for it, such as a server GTM container or a partner. The order side of store tracking is in Shopify conversion tracking.
Ensighten, Tealium and the partners
On Ensighten, use the "Twitter Pixel" app; X marks the older "Conversion Tracking (UWT)" app as deprecated. On Tealium iQ, use the "Twitter Pixel" tag. For the server side, X lists Conversions API partners: Adobe, Tealium, MetaRouter, Datahash and RudderStack. For WordPress, WooCommerce or another shop system X documents no integration of its own: use the base code in the theme's header, or GTM.
Verify the Setup: The X Pixel Helper and Events Manager
The X Pixel Helper
The X Pixel Helper is a free Chrome extension; in the Chrome Web Store it is still listed under its old name, Twitter Pixel Helper. Open any page with the Pixel and the extension's badge counts the pixels that successfully sent data. Open it to inspect each event and its parameter values, and read its warnings, such as a pixel firing more than once on the same page. Pin it and walk the funnel: the landing page, a form, a test purchase.
Event statuses and the Recent Activity Log
Event statuses in X's Events Manager
| Status | What it means | What to do |
|---|---|---|
| Active | The event has had activity in the last 24 hours | Check the parameters in the Recent Activity Log |
| No recent activity | The event has fired before, but not lately | Trigger it yourself and watch the Pixel Helper |
| Inactive | The event is not receiving activity | Check the event code, the trigger and that the base code is on the page |
The Recent Activity Log under each event shows sample hits with their parameters and the host name they came from, which is how you catch a Lead arriving without its value, or a staging domain firing into the live Pixel. Give the reports time after that: X finalises them within 24 to 48 hours, in a batch process that removes duplicate tag fires and adjusts attributions, so a count can move after you first see it. Last, click your own ad and check that the landing page opens with twclid in the URL.
Next: Add the Conversions API
A Pixel on its own is a browser measurement: ad blockers and privacy settings take a share of its events, and it never sees what happens after the website, such as a qualified lead or a won deal in your CRM. X documents the Conversions API for exactly that, conversions that start online and finish offline, sent from a server with the twclid, the hashed email and phone, the IP address and the user agent as identifiers.
Three things carry over from the Pixel setup. Give every event both sources send the same event and the same conversion_id, so X counts it once. Keep the twclid from the landing page, because the Pixel passes it on its own and your server does not, and X recommends always including it. And keep one meaning per event, so a Lead from the browser and a Lead from the CRM are never two different things. The server setup (token, payload, identifiers, errors) is in the X Conversions API guide, and how it all fits with the CRM is in the X Ads conversion tracking guide.
How LeadJourney Works Alongside the X Pixel
LeadJourney does not replace the X Pixel, and you do not need to remove it. It is one script on your site or in your GTM container, live in about 21 minutes without a developer, running server-side and first-party on your own domain at 95%+ tracking accuracy. On the first visit it issues the LeadJourney Click ID, our own visitor identifier kept in local storage and a first-party cookie for months, and stores every session under it, with the ad platforms' click IDs (gclid, gbraid and wbraid, fbclid, msclkid, li_fat_id, rdt_cid and X's twclid) as properties of the session. The twclid is captured server-side on every X click, which is exactly the identifier a Conversions API setup has to keep for itself.
The X Ads integration connects your X Ads account by signing in, imports campaigns, ad groups, ads and daily spend, and follows each lead through your CRM, or each order through Shopify or Stripe. The CRM stages you map, for example a qualified lead and a won deal with its value, go back through X's Conversions API as the stage changes, with the value, the currency, the twclid, hashed email and phone, and a conversion_id that deduplicates against the Pixel you keep running. The Pixel keeps doing the browser half; the server half comes from the system that knows how the lead ended.
In LeadJourney's own reports the X click sits in the full journey next to every other channel, with no attribution window, under first click, last click, linear, position based, time decay and other models. It does not do view-through or engagement attribution, so the conversions X credits to a like or a view stay an X number. Processing runs in Frankfurt under a GDPR data processing agreement.
Read verified reviews on Trustpilot, G2 and leadjourney.io/testimonials.
Further Reading
- X Ads conversion tracking: what to count, the engagement windows, CRM events and which number to trust.
- The X Conversions API: the server side, from the token to deduplication and CRM events.
- X Ads UTM parameters: tagging the ads so GA4 and your CRM see the campaign.
- X lead generation ads: native lead forms, which the Pixel never sees.
- For stores: Shopify conversion tracking.
- On the product side: the X Ads integration, server-side tracking, UTM and click ID tracking and the Shopify integration.
- In the glossary: conversion tracking, click ID and first-party data.
In the glossary
FAQ
Frequently Asked Questions
The questions that come up while the X Pixel goes onto a site, a container or a store.
How do I set up the X Pixel?
In X Ads Manager, open Tools, Events Manager and select Add event source; the event source ID is your Pixel ID. Install the base code once on every page, before the closing head tag, or use Google Tag Manager through Events Manager's partner integration, Ensighten, Tealium iQ, or X's app on Shopify. The base code creates Site Visit and Landing Page View events by itself; create Lead, Purchase or Custom events for your conversions, fire them with event code and check them with the X Pixel Helper.
How do I install the X Pixel with Google Tag Manager?
In Events Manager, open Install Pixel, Partner Integrations and choose Google Tag Manager. Sign in to Google, choose client side (the Pixel), server side (the Conversions API) or both, and select the container. For events beyond the page view, switch on "Track Google Tag Manager dataLayer Standard Events" and make sure your site pushes those events. Use this route or the pasted base code, not both, or every event fires twice.
How do I install the X Pixel on Shopify?
X publishes a free app called X in the Shopify App Store that installs the X Pixel in one click. Remove any X base code already in the theme first, so the store does not carry the Pixel twice. X's listing does not say whether the app sends Conversions API events, so if you need the server side on Shopify, plan another route for it.
What events can the X Pixel track?
When you create an event in Events Manager, the types offered are Page view, Add to cart, Lead, Added payment info, Purchase and Custom. The base code also creates Site Visit and Landing Page View events by itself. Each event is fired with twq('event', 'tw-<pixel id>-<event id>') and can carry parameters such as value, currency, conversion_id and contents. X asks for each conversion type to be used once on the site.
What is the X Pixel Helper?
A free Chrome extension from X, still listed in the Chrome Web Store as Twitter Pixel Helper. It detects X Pixels that successfully send data on the page you are on, shows a count badge, lets you inspect the parameter values, and warns about problems such as a pixel firing more than once. Use it together with the event statuses and the Recent Activity Log in Events Manager, which show what X actually received.
Why is my X Pixel not firing?
Check the X Pixel Helper first, then Events Manager: an event marked Inactive is not receiving activity. The usual causes are base code missing from the page you are testing, event code that runs before the base code, an ad blocker in your own browser, a Content Security Policy that blocks ads-twitter.com, ads-api.twitter.com or analytics.twitter.com, or the Pixel sitting inside an iframe. If you cannot even find Events Manager, the ad account may need a credit card on file.
Is the X Pixel the same as the Twitter pixel?
Yes. It is the same website tag under X's name: the base code still loads uwt.js from static.ads-twitter.com, Ensighten and Tealium still call their integrations "Twitter Pixel", and the Chrome extension is still listed as Twitter Pixel Helper. Older guides written for the Twitter pixel show earlier versions of the code and of Events Manager, so copy the current snippet from your own account.
Keep reading
More from the blog
 How To Guides
X Ads Conversion Tracking: Pixel, CAPI and CRM Events
X reports what the X Pixel and the Conversions API tell it, credited after any engagement inside windows you set per event. What to count for lead generation and for a store, how the two sources deduplicate on one conversion ID, why X's count and the CRM disagree by design, how to verify it, and which number deserves the budget.Read the article19 min read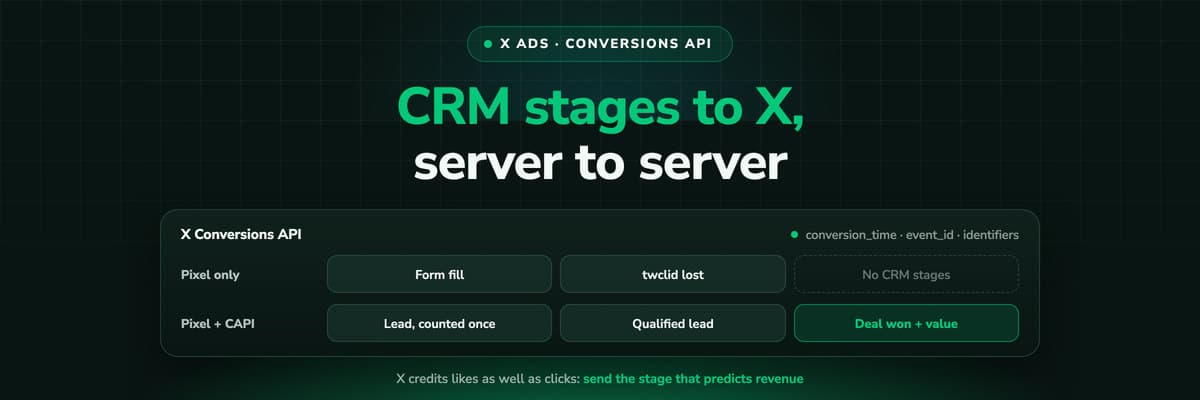 How To Guides
X Conversions API: Setup, Deduplication and CRM Events
The X Pixel reports what a browser lets it see. The Conversions API reports what your server tells it, including stages that happen in the CRM after the form. The endpoint and body, the access token against OAuth, identifiers and hashing, deduplication against the Pixel, the twclid you have to keep yourself, the limits, and what X will credit from a CRM.Read the article16 min read How To Guides
X Ads UTM Parameters: twclid, Naming and the GA4 Setup
X appends one parameter to your landing page by itself, the twclid click ID. Everything else you type, because X documents no URL macros. What twclid is and where it goes, how to tag a website card or a link in a post, a naming convention GA4 reads correctly, why X's conversion count and your UTM report never agree, and why UTMs on their own lose the X click long before the deal closes.Read the article13 min read
X tracking
Ready to send X the conversions your Pixel cannot see?
LeadJourney keeps the X click ID server-side from the first visit, follows every lead into your CRM, and sends the stages you map back through X's Conversions API with the value, deduplicated against your Pixel. Live in 21 minutes, 14-day free trial without a credit card.